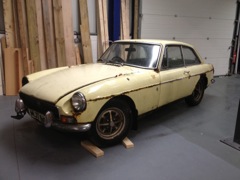
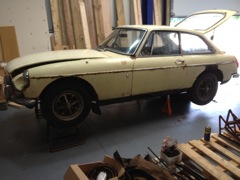
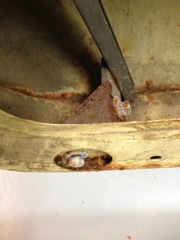
IMG_1065
MGB Before we started
|
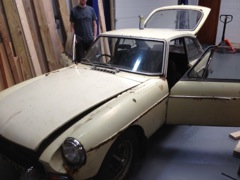
IMG_1068
MGB Before we started
|
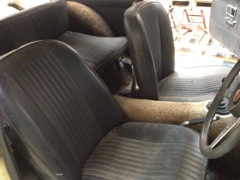
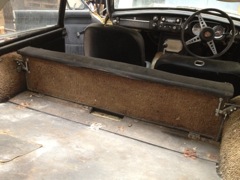
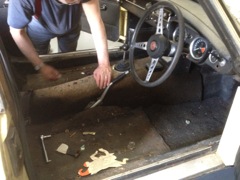
IMG_1069
MG Interior before we started
|
|
IMG_1070
More interior before we started
|
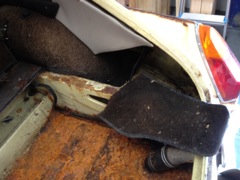
IMG_1071
Interior rear seat (back of) before we started
|
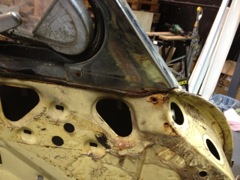
IMG_1072
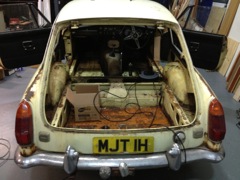
Before we started view from the back
|
|
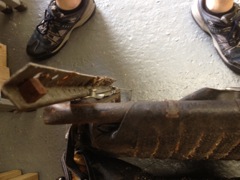
IMG_1073
Raised on ramps and axle stands
|
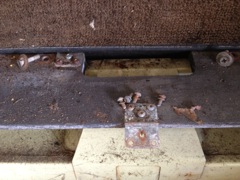
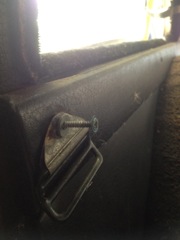
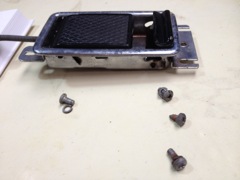
IMG_1074
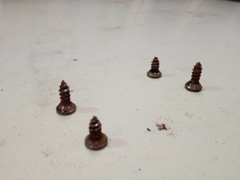
Screws holding boot cover in place. Large screws round the edge, and small screws used in the hinges
|
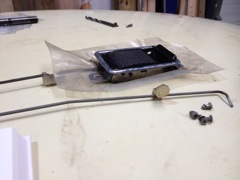
IMG_1075
These smaller screws are machine type screws not wood screws - and are used in the hinges for the boot cover
|
|
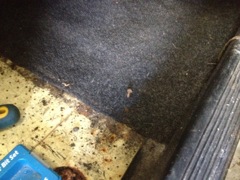
IMG_1076
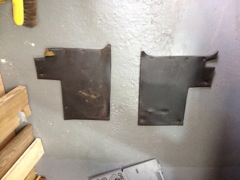
This bit of carpet goes in this corner it's not quite the same shape as the one on the left hand side. The left hand side was in pretty bad shape
|
IMG_1079
Seats removed
|
IMG_1080
Seat runner. Square hole on the side - round holes down to the floor
|
|
IMG_1081
Seat belt bolts, with washers. Note the sold one with the insert going through the thin washer into the fixing bracket
|
IMG_1082
Seat belt bracket showing order of washers
|
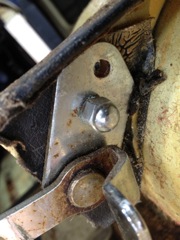
IMG_1084
Front carpet was fastened down with two screws near the seat. These are probably an after thought as the original looks like it should have been press-studded down.
|
|
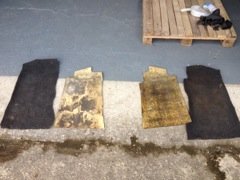
IMG_1085
Front carpets, with the foam from underneath. These carpets may or may not be original - the passenger side one looks a bit hand cut.
|
IMG_1086
Rear interior black trim screws - long. The one nearest the front holds the seatbelt bracket in, as shown here
|
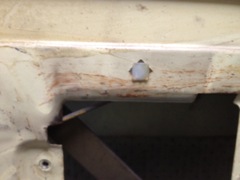
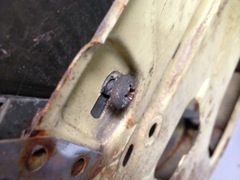
IMG_1089
Hinge for boot, the spacer is between the hinge and the door
|
|
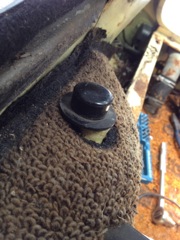
IMG_1091
Plastic cover on the top of the rear wheel arch. It's in two pieces - big washer and small hat
|
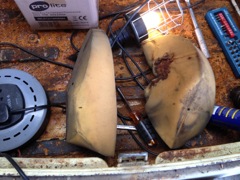
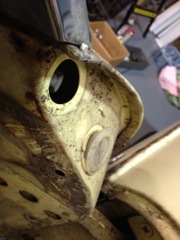
IMG_1093
Foam inserts that go in the wings at the back. They're not the same - the one with the rust marks on it is for the right. They are currently the right way round in this picture
|
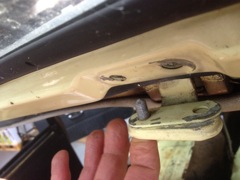
IMG_1094
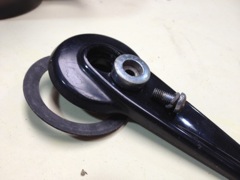
Rear seat catch for holding the rear seatc back in place. There are two bolts, with the fancy looking one on the back, visible from the boot. Note the washer on this side of the shiney plate.
|
|
IMG_1095
There are a couple of clips on the heel plate, that are probably supposed to hold the rear seat cushion in place. They also hold the carpet down
|
IMG_1096
The heel plate has a chunk of foam behind the carpet.
|
IMG_1097
Silver trim goes inside the doors on both sides. There are a bunch of small (rusty) screws holding it down.
The outer sill plate has 6 screws. three along the top near the door, and 3 on the outside lip.
|
|
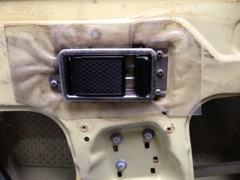
IMG_1098
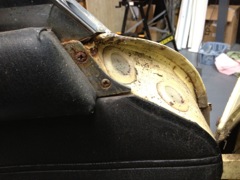
Passenger map pocket. Four screws, two that you can see and two round the other side that you can't see. At least one was rusted through on removal.
|
IMG_1099
Up near the bonnet leaver, theres a hard-to-reach screw holding the side panel in place
|
IMG_1100
Interior trim panels. from the outer sides of the front foot wells. Both sides have matching screws, including one that's impossible to reach on the drivers side behind the wiper motor (or something)
|
|
IMG_1101
Progress after two dismantling sessions. Much interior stripped
|
IMG_1102
End of door trim the end bit above the catch is rivited on apparently, but the black vinyl bit has 2 screws at each end.
|
IMG_1103
The front end of the padded vinyl part under the front windows. 2 screws like the other end
|
|
IMG_1104
The four screws that hold the black padded vinyl on to the door. note that the top one at the front and the bottom one at the back are shorter for some reason
|
IMG_1105
Window winder. The black plastic washer was missing on the drivers door
|
IMG_1106
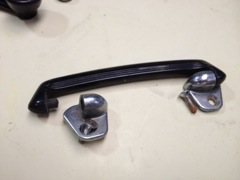
Interior door pull with screws (no washers)
|
|
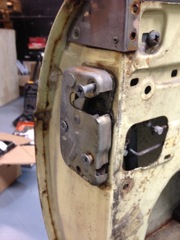
IMG_1107
This is the door catch inside the door. There are three connecting rods. One for the, inner handle, one for the interior lock and a smaller one not in the picture for the keyoperatied lock. The ends of these rods just puch into the plastic grommets to make the connection. Then the brackets swings round and clips on to the rod
|
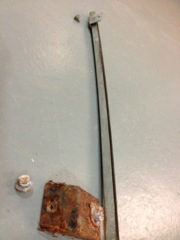
IMG_1109
The door catch has three screws holding it on to the door
|
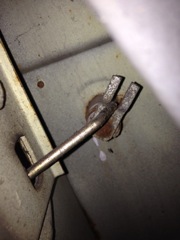
IMG_1110
This is the much smaller connecting rod, connected (or resting in) the key operated door lock
|
|
IMG_1111
Interior door handle - three screws the same and for some reason the passenger side only had an exytra smaller screw in the middle
|
IMG_1112
This is the end of the second rod connecting the handle to the door catch. It just slots into the lock leaver in the handle.
|
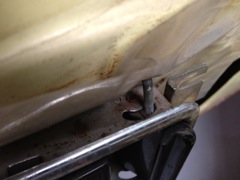
IMG_1113
Remember the extra third screw on the passenger side? Here it is!
|
|
IMG_1114
This plastic squre bit is the clip for a little hook that supports the locking rod, from handle to catch. This was removed last after the handle, and opening rod
|
IMG_1115
This is the loacking rod, with it's plastic support and the handle attached to the opening rod.
|
IMG_1116
The rear runner (padded felt style groove) the supports the back of the window, has 2 screws holding it in the place. This is the top of the runner.
|
|
IMG_1117
This is the bottom of the rear window runner. The bracket at the bottom was remvoed with the runner.
|
IMG_1118
Rear window runner removed, with screws shown. These screws were left attached to the runner in storage for a while
|
IMG_1119
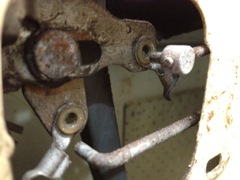
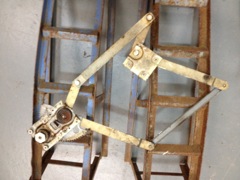
There are 3 bolts supporting the center of the window opening mechanism. I'm not looking forward to putting this back in! There are another 4 identical looking bolts holding the winding mechanism to the door. They are not the same size though!
|
|
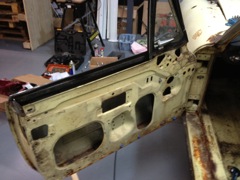
IMG_1120
Look a naked door!
|
IMG_1121
This is the window rasing lowerering mechanism. It's been pretty well greased in the past, and probably needs more grease on re-fitiing. That is, if you can figure out how to get it back inside the door.
|
IMG_1123
Two big holes on the front corner of the door are filled with plastic grommets. There are four bolts holding the little window on. 2 at the front and two underneath.
The underneath bolts have rectanglular chunky 'washers' before the door frame. They look a big like magnets, and will only fit one way round.
|
|
IMG_1124
Plastic gromets on the front corner of the door
|
IMG_1125
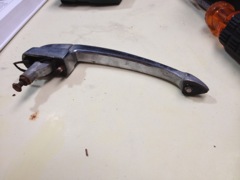
This is the in-side of the outer door skin, howing the handle nuts. Note the one on the right of this pictuyre that sheared off on removal. The bigger bolt on the left, is the sprung loaded one that gets pushed in when you press the outer door handle button. I guess this must connect with the door catch in someway...
|
IMG_1126
Here's the door handle button-bolt again. Along wit the rubber seal that goes on the outside of the door
|
|
IMG_1127
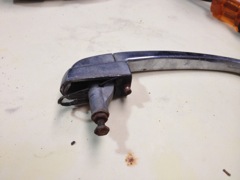
Door handle with sheared off bolt on the right hand side.
|
IMG_1129
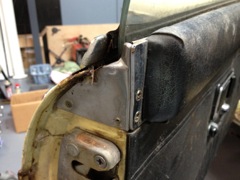
The middle of this image is a very rusty clip (the only one that survived. These clips hold the rubber window seal on to the chrome shiney bit that's rivited to the top of the door.
|
IMG_1130
At the bottom of the door is another bracket with a bit of soft stuff (like sound proof material) glued on. This is to stop the glass when you wind the window down. It has two screws on the inside of the door, as you can see here, and 2 more underneath the door.
|
|
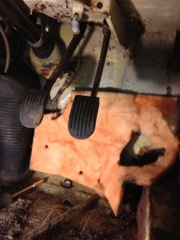
IMG_1131
The carpet behind the pedals has a chunk of sound proofing / insulation behind it. This carpet was difficult to remove becuase the larging screws holding the accelerator stop bracket in place were very awkward to remove. We ruined one removing it.
|
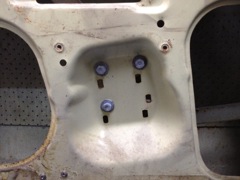
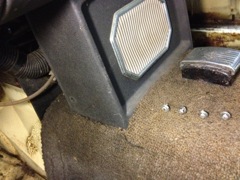
IMG_1132
There are four screws holding the speaker mounting in place. two on each side
|
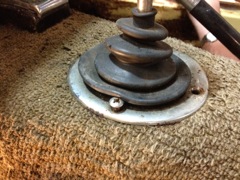
IMG_1133
THe gear lever surround has four chunky screws holding it down - they were not all the same..
|
|
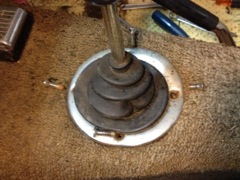
IMG_1134
This blurry pic makes it hard to tell, but the shorter of these four screws is furthest from the dashboard.
|
IMG_1135
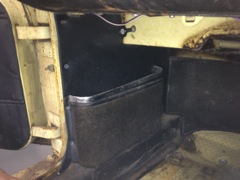
By the end of today, we have removed most of the inner trim and stuff.
|
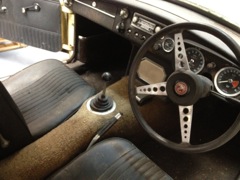
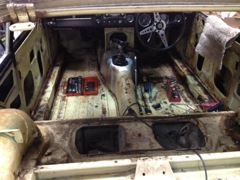
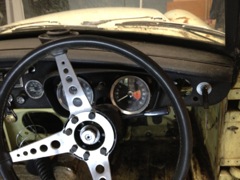
IMG_1140
Dashboard layout
|
|