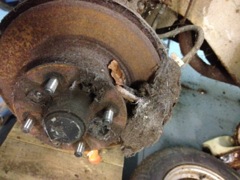
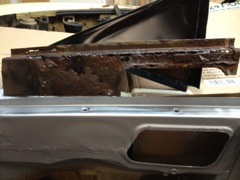
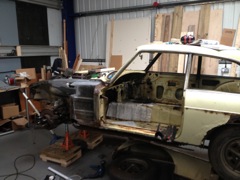
IMG_1228
How much spiderweb / leaf can you get in one brake?
|
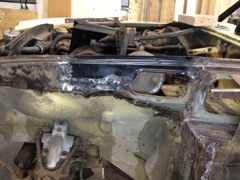
IMG_1232
First effort at cutting a repair panel to about the right size to be welded in. Apparnetly this is ok. Perhaps with 20/20 hindsight, using the whole of the whole in the new panel would have been clever as the new hold and the old hole doesn't quite line up. We had to do it like this to keep the wing bolt holes correctly aligned.
|
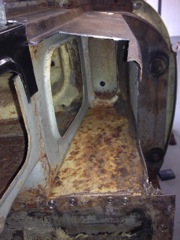
IMG_1235
Rusty rust in the front wings
|
|
IMG_1236
Look we've welded something!
|
IMG_1237
So it might not be perfect but for our first bit of patching up it's not bad. Even put a patch in the top of the box section thingy too
|
IMG_1240
top = before bottom = after. Wonky hole, but much less rust. Welding requires practice.
|
|
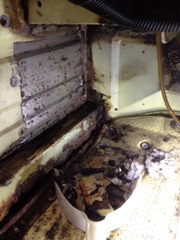
IMG_1241
Today I had a go at scraping off the sound insulation
|
IMG_1242
This is the bottom of the sill on the passenger side. As you can see some of the sill has been replaced before. The new and old bits overlap, and are starting to peeel apart.
|
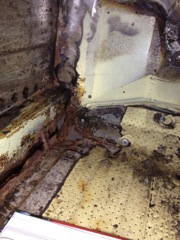
IMG_1243
This is the passenger footwell after we removed some soundproofing. Mucho holes. Hopefully we can fix this up a bit over the next couple of weeks.
|
|
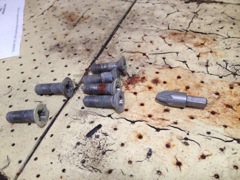
IMG_1244
So the door came off eventually. It was much easier after we got the right size Pozi bit. The door hinges are a PZ4.
|
IMG_1245
These are the door hinge screws. Less a few that didn't wantto come out until they got persuaded a bit. A few new screws are required.
|
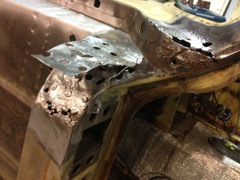
IMG_1246
So the top of the A pillar has plenty of holes in it. Some caused by rust, and some caused by me drilling out the spot welds.
I've 'peeled' back the various panels here to get access to the lower ones. Welding practise here we come.
|
|
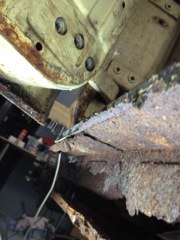
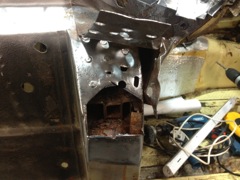
IMG_1247
rusty section cut out of the pillar. New bit to make.
This is what the inside of the pillar looks like. It's actually not too bad, so a good cleaning out and a bit of rust converter + primer will have to do here, as we're not replacing the whole pillar right now.
|
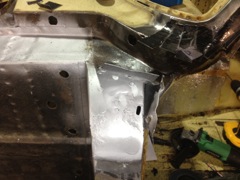
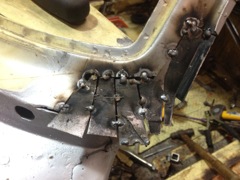
IMG_1248
OK, more welding practise required. You can also see what we're planning withe bottom corner of the windscreen surround too (aka 'scuttle')
|
IMG_1250
Look something shiney! - Shame about the welding though
|
|
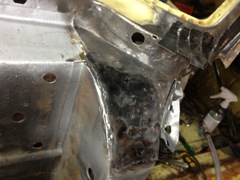
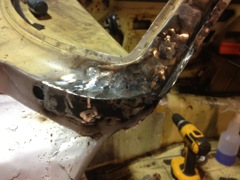
IMG_1251
Zinc primer applied. Lumpy welds R us. Luckily no one will see this once the wing is back on. I've applied a lot of weld here, so I'm hoping that even if it's not all great there's enough to make the whoel thing strong enough.
|
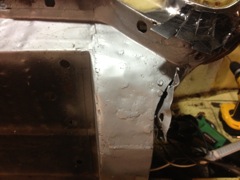
IMG_1255
Final panel put back on - again probably a bit too enthusiastic with the welder. blob, blob, blob. Also the worst of the rust bits have now been cut out of the scuttle at the front. Might have a go at filling in these new holes in the next couple of days.
|
IMG_1256
So these are the little bits in something approximating the right shape, blob welded together. Now to fill in the gaps. Can we weld it? well probably.
|
|
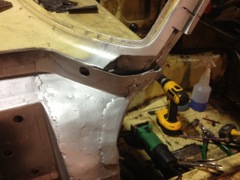
IMG_1257
Look it's as good as new, you'd never know anything was ever done. Except for the guttering which I'll look at later. Overall - quite pleased.
|
|